Friday, March 29, 2013

Clear Stamp Organization

Over the years I have stored my clear stamps in several different ways: in the original packaging, in baskets, in page protectors, in binders, in CD cases and in drawers.  Until now I haven't been completely satisfied with any storage system.  There has always been talk on the message boards about stamp storage and about whether or not to take apart the stamp sets and organize them by categories.  I decided to use binders because it made the most sense for my scrap space.  I purchased them with a coupon and a special promotion at Staples. The binders cost $9.99, but I don't remember what the final cost was with the discounts.


After much hesitation I separated my stamp sets by categories. (I kept all the original packing in case I ever want to put the stamp sets back together). I have to admit that I second guessed myself during the whole process especially when I had a hard time deciding which category a stamp should be in!
I came up with the following categories:
Shapes and Travel
Journal Labels
Alphas, Numbers, Dates
Phrases
I'm using this binder by Martha Stewart  and  a variety of page protectors .   These pages are perfect to hold stamps because each pocket has a flap that keeps the stamps from falling out while flipping through the binder. The stamps in these binders are the ones I use the most for Project Life and scrapbooking. 
This page is from the Phrases Binder.  

I cut down two clear transparency sheets to fit comfortably inside the page protector from the scrapbook section at Michael's to hold the stamps.  Washi tape holds the two transparencies together.  I added white cardstock to the page protector to add stability.
This page is from the Journals and Labels binder

This page is from the Alphas, Numbers and Dates binder
All my alphas are on the original plastic sheet.

The stamps I use to make cards are stored in 8.5x11 office binders using the Martha Stewart Page Protectors. And my wood mounted stamps (which are very few) are in a Jet Max drawer.  
 
This page is from the binder that holds stamps for card making.

For Cling Stamps I only added cardstock to the pockets for stability; there is no need to use clear transparencies because there is one stamp per pocket and the stamp is easily removed from the pocket.  The stamps in the card making binders are loosely categorized by Theme (birthday, Christmas, baby etc), Sentiments, Floral and Backgrounds.  
This page is from the Shapes Binder


I love this thing!
This Martha Stewart desktop organizer is where I keep my most recent stamp sets as well as my favorite alpha stamps. The stamps I get with my monthly kits go right into this organizer. It sits right on my desk and everything is within reach.  Older stamps tend to lose their stickiness so keeping the stamps in the pocket page reduces the risk of losing a stamp. I keep the stamps in the organizer while using the set. . Once I have used the newer stamp sets enough I transfer them into a pocket page.  Because the stamps that I get from Citrus Twist Kits and Studio Calico Kits are usually smaller than 4x6 I will keep them in the original plastic sheet and store them in a Martha Stewart page protector.   I think that I will end up storing the pages of newer stamps in a basket because my binders are pretty full and I'm not sure I want to invest in anymore of them.  Adding the cardstock to the page protector provides enough stability that I will be able to easily flip through them in a basket.  

Cataloging Stamps:

One year I actually stamped every single image onto cardstock and used my Bind It All machine to create a catalog of my stamps. That was one of the most exhausting projects ever! Every so often I flip through it but it is a reminder of  all that exhausting work.  It doesn't even look nice!  Anyway, now that I am wiser...this is what I do:

I cut and paste an image of the stamp set from the internet into a word document and VIOLA! All done!    This system works because it also provides me with the original image of the stamp set, the name of the set and the manufacturer information!  The catalog is categorized by manufacturer then by theme.   

When deciding on how to store or organize your supplies do what works for you and your work space.  My space is small and in the basement and I have to keep that in consideration when organizing my supplies.  I will admit I often find myself green with envy when I see the beautiful scrap rooms all over the message boards. I tell myself  "Maybe one day but for today enjoy the space that you do have!"
I keep my stamp binders on a shelf made by Jet Max.  The 2 white binders hold my Card Stamps, the small black binders are my PL and scrapbook stamps and I have 5 WRMK 12x12 albums on this shelf also. I'm not sure what is in the 3rd white binder...maybe some sketches from a class.

How do you store or catalog your stamps?   
Please share and let me know if you have any questions.
Thanks for stopping by!
Marisol
  

Thursday, March 21, 2013

Throwback Thursday (on Friday)

Just because I didn't have time on Thursday!
This is another spread from PL 2011.  I used Picasa (It's FREE! Click here to learn more and download) to add the text directly to the photos.  I can't say enough about Picasa because it is so user friendly! Of course it is not PhotoShop but until I actually learn Photoshop I'll use Picasa.  There was a bit of a learning curve on text placement because of the photo printing of digital images.  I learned that I had to place the text away from the edge of the photo in order for it to print correctly.   

I used the day and arrow stickers that came in the kit.  Later in the year I stopped using them and my son said "Now I don't know which journal card goes with which picture!" Now I use date and arrow stamps to help the kids identify the journaling with it's corresponding photo.

On the right side of the spread I created 3 collages in Picasa.  The only thing I wish Picasa would do is give the user the ability to move the photo around when creating a collage.  For example, in the picture of the sneaker I would have liked to have been able to move the picture slightly to the left to feature the more of the NIKE symbol.  I'm hoping Google will do an update and include that feature.  

I included the recipe for homemade playdoh and have gone back for the recipe several times since adding it to the album.  The recipe is simple and easy to follow with a great end result!

Give it a try!
1 cup flour                 1 cup water                       food coloring of your choice
1 tbsp oil                    1/2 cup salt                       2 tbsp cream of tarter
Combine water, oil, salt, cream of tarter and food coloring in a medium size sauce pan and heat over medium heat. Remove from heat when the ingredients have mixed well and salt has dissolved. Add flour and stir. Remove the dough from the saucepan and knead. WARNING: The dough will be HOT!  I recommend putting the dough on wax paper and using the wax paper to help knead the dough.  Store in an airtight container or ziploc bag.  
Let me know if you give the recipe a try!
Thanks for stopping by!
Marisol


Monday, March 18, 2013

Project Life Week 8

Project Life 2013 Week 8
February Break! It was a much needed break from work and school for our family.  The beginning of the week was very ordinary. The second half was much more exciting because my sister-in-law and my nephew came to visit us all the way from Georgia! This was also the week I decided to start the blog!

I used the February SC PL kit and some elements from the January kit in addition to stamps and washi tape from my stash. I really liked working with the aqua, yellow and brown color combo this week.

I added 7 yellow stars on the left side of the spread-one for each member of our family. One of my favorite things to do is to add labels directly to the pictures. The label I used on the top left photo was too long so I cut it and stacked it for a different look.

Because there are so many colors in the pictures I decided to use similar elements on the spread to try and unify all the pockets.  For example, I used the same color ink for all the stamping and writing;  I used the same letter stickers throughout the spread; I used similar labels and the yellow stars are found on both pages. In the bottom right corner I used 2 stars to highlight the week of the month.  
My cutie LOVED the chocolate covered strawberries his auntie brought us from her favorite shop in PA.
Yummy!
I'm really not this far behind with PL...I have up to week 10 completed (I just haven't posted the completed spreads here yet).
I'm still struggling with taking good pictures of my spreads.  Not only was I struggling with glare but I was also struggling with this little guy: 
The page was created by my 4 year old daughter. 

Well thanks for stopping by!
Marisol


Saturday, March 16, 2013

Caitlin & Claudia Isabel

I have had this picture of the girls for a very long time.  I'm so glad I was able to finally scrap it! The story is about how my daughter and her cousin (who lives in England) have the same middle name.  In fact two of my other nieces share the name too!  No it is not a family name, we all just like the name! Although now one can say that it is a Family Name!

I used the January Citrus Twist kit and some embellishments that have been in my stash for months
I actually made this page a while ago and now can't remember any details about the products I used. HA.
I created this layout for a challenge over at SC. The challenge was to use unloved or unopened products.  I have had the SC butterflies and the epoxy stickers for a VERY long time. It felt good to finally use them.
I LOVED the gray trim from the CT kit. I think I used it on a couple of pages.  
By the way I won the challenge!  It was a random pick, but I still won!  The challenge was hosted by Paperandglue- a Studio Calico member She is also on the Project Life Creative Team for Becky Higgins.
Thanks for stopping by!
Marisol


Citrus Twist March Main Kit and an update

March Kits

I can't wait to get my hands on these kits! I love the colors and the embellishments are fabulous.
Citrus Twist March 2013 Main Kit


Citrus Twist March 2013 Project Life Kit
I have been absent from my blog because it was a rough week.  A dear friend passed away last Saturday and our hearts are broken.  Death is so emotionally draining. And last night my Mom fell and is now hospitalized. It's time like these that we are reminded to cherish the everyday moments.
I hope to be back with a Project Life share.
Thanks for stopping by.
Marisol

Saturday, March 9, 2013

Citrus Twist Sunday Sketch Challenge

Sunday Sketch March 3, 2013

Happy Saturday!  This week just dragged on and it was a rough week at work!  So happy to have a few hours today to be crafty.  Since last weekend I created 2 layouts! I decided to work on our Georgia Vacation Album because we are planning to go back this summer.  My goal is to work on the album NOT to finish it by the time we return...Remember my motto: Anything I do to record our memories is better that nothing at all!

I have 18 layouts completed and the ENTIRE album is planned out with pictures, sketches and journaling!  I have all the supplies I'm using separated from the rest of my stash making it easy to just pick a page and get to work.  

This week's Citrus Twist Sunday Sketch was fun to work with.


I stayed really close to the sketch with a few exceptions. I did not tilt my photos and I moved the title to the top of the page.  I used a circular element to the embellishment clusters and added the camera and washi tape. For the layering I cut  two 6x6 patterned papers in half and arranged them on the page-super fast and simple!   I wrapped yellow string around one of the felt circles to mimic the sun.  

 This page is full of a variety of manufacturers:
 Paper by Studio Calico Abroad Collection
 Embellishments from Citrus Twist (felt circles)
 Enamel dots by MME
 Letter stickers by Heidi Swapp and Studio Calico
 Cloud washi tape by KI Memories.  
Ink spatters using Mister Huey's Honor Society (I'm loving ink splatters now-I used to think they were stupid and served no purpose) 
I fussy cut the black cameras from the Echo Park This & That collection.  
The 'trip' embellishment on one of the cameras is SUPER old.  I have had it for over 10 years!  I gave the pack of embellishments to my daughter months ago and I thought it was perfect for the page because it looks just like my daughters sundress.  (You are right I NEVER PURGE)

Thanks Citrus Twist for another great sketch.
Thanks for stopping by.
Marisol


Thursday, March 7, 2013

Throwback Thursdays

Welcome to Throwback Thursdays. A new series.

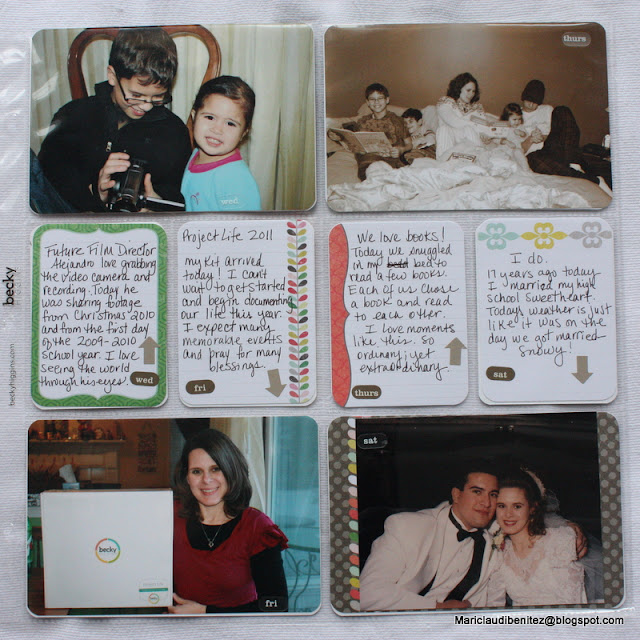
Every other Thursday I will be sharing a spread or two from my previous Project Life albums.  This is in an effort to update my albums.  I never finished 2009, 2011 or 2012.  Sounds overwhelming doesn't it? 
At times I do feel overwhelmed but then I remind myself that anything I do to document our story is good enough and way better than nothing at all.  And I haven't set any deadlines for myself...I don;t need that kind of pressure!
All of my albums have the pictures and dates in them.  I also have the journaling to accompany the pictures.  In my opinion that is the hardest part! The 2009 album needs the most work, 2011 needs just a few touches here and there and the 2012 album needs a fair amount of work. 
I decided that I would "stay current while catching up"  I plan to use the left overs from my monthly kits to work on the incomplete albums. Until PL I was never able to keep up with scrapping our pictures and our stories.  I really do love this system because it works for me. 
If you would like more information about Project Life click here .

PL 2011 Intro Page

I was expecting our 5th baby and decided to add his picture too!  I used the Becky Higgins Amber Edition Core Kit Back then the kit came with the core kit, the album and page protectors.  Now you buy everything a la carte.  While I'm not happy with my choice of cards I really do love these pictures of us.

PL 2011 Week 1 Left Side

PL 2011 Week 1 Right Side

Yes that's us on our wedding day! Our wedding anniversary falls shortly after Christmas and so we never really do anything and I didn't take a picture.  Instead I added a picture from our wedding day and the card my hubby gave me.
I used a office supply store 8.5x11 page protector, trimmed it down and hand stitched it closed.


As I share more of this album you'll see that my style changes, I use less of the core kit and more hand made journaling cards.  I documented just about EVERYTHING in this album.  And I love it. BUT I toned things down a little bit in 2012.  For example, I decided NOT include the kids report cards and other school related items. I am putting those in their individual school album (which are in PL style).  I am more selective about what I document and how many pictures I use to tell the story.  I find myself wanting to TELL more of the story, beyond the obvious information one can get from the picture.

Well thanks for stopping by.
Marisol

Tuesday, March 5, 2013

Project Life 2013-Week 7

Valentine's week


Although it was Valentine's week I keep this week simple. And I like it!  This week I included memorabilia i.e. packaging, a couple of valentines and I altered a SC 3x4 card.  Now that I think about it I forgot to include the valentine I gave to my hubby.  That's ok I'll just put it in an insert later.
Sorry about the glare. I usually take the pictures out of the pockets but I had very little daylight left and my baby kept photo bombing the photo session!

My 4 year old daughter LOVES Princess Merida from the movie Brave.  I included some of the packaging the doll came in.  Look at my 1 1/2 year old...apparently he loves Merida too!

The Love @ first sight 3x4 card is from the February Studio Calico PL kit.  It was originally just the heart. I added the arrow and the lettering.  You can't tell from the picture but I used a glitter pen to trace the heart a few times.

The bottom half of the spread focuses on a field trip I chaperoned for my son. I thought the star 3x4 card was perfect for the picture.

 The right side of the insert is also very simple-so much so that I didn't even write anything on the 3x4 cards. I included a couple of cool valentines-the images change when you move it.  In 2011 I included lots of valentine memorabilia! I want to point out that on this side of the spread I included 2 black & white pictures and 2 colored pictures. Why? Because the 2 black & white pictures originally had a very bad exposure because of the poor lighting in my house.

Today I'm linked up to The Mom Creative .
Thanks for stopping by!
Marisol

Saturday, March 2, 2013

You + Me =Love

Happy Saturday!

This is my first layout in months!  
Using the Sunday Sketch from Citrus Twist I created this layout.  

I used the Citrus Twist January Main Kit . I fell in love with the bold floral paper but it was really bold!  So I used a 10x10 gray card stock to tone it down.  For the first time EVER I used ink splatters and I like it! I  added green flat back pearls to complement the red ink spatters. I should have toned down the red heart paper by covering it with vellum, oh well. I also really like the gray trim and after a few attempts at placement I made it work! The You + Me card is from the Citrus Twist February PL Kit . I cut it out from the 12x12 paper, trimmed it down and added it as my title.  The puffy heart in the letter O is from Amy Tangerine Remarks collection.

I can't believe how quickly this layout came together.  I'm usually a very slow scrapper.  
Thanks for stopping by.
Marisol